The following article will help you to assign different chat operators to individual data driven pages, instead of assigning one single chat operator for a whole set of pages.
How are Data Driven Pages generated?
Data Driven Pages (DDP) are automatically created using a single dataset, which removes the need to create similar individual pages manually. A dataset is created in a spreadsheet format (similar to MS Excel), which contains all the necessary content, including title, description, images, video, etc.
The dataset is connected to a template page. The Sinorbis platform reads through the dataset and generates the corresponding pages automatically.
For example, lets imagine a website recommending accommodation around the world. The Sinorbis user can label the accommodation according to Country, State, City and enter respective data into the dataset, such as location, images, and pricing. The Sinorbis system will then automatically read this data and generate multiple pages to save time and effort.
For information about Data Driven Pages and how to set it up, see:
Overcoming previous DDP limitations
Prior to the recent updates, you could only assign one chat operator per dataset, which meant that multiple pages would only have one chat operator.
If we take the above example of an accommodation website, if you want to assign local chat operators for each individual page (e.g. a Sydney resident for the Sydney city page), previously it was not possible.
However, the recent update allows admin users to assign individual chat operators to each individual DDP. The following 5 steps demonstrate how to assign different chat operators to individual pages.
- Login to the platform
- Go to Live Chat settings
- Go to the Target section
- Select the relevant website pages
- Assign chat operators
1 Login to the platform
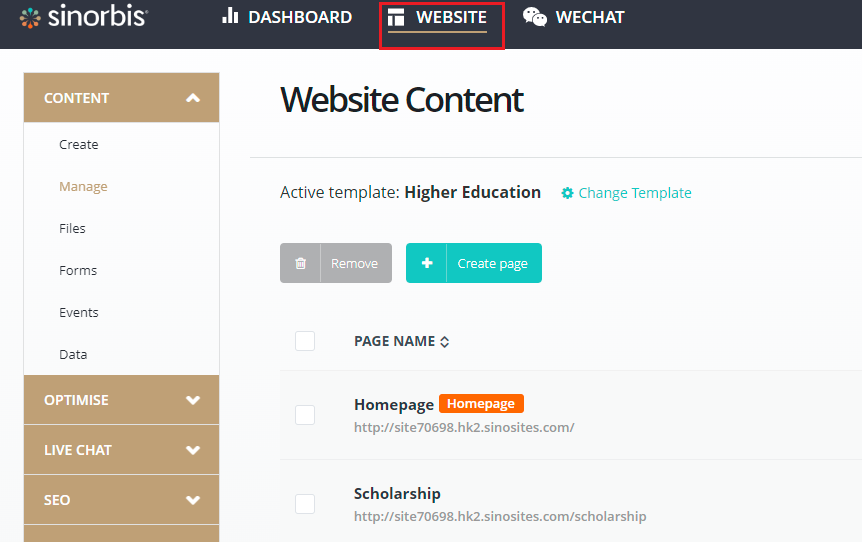
Login to the Sinorbis platform using the correct credentials for a user with admin rights. Next, navigate to the Website section by clicking Website in the title bar.

2 Go to Live Chat settings
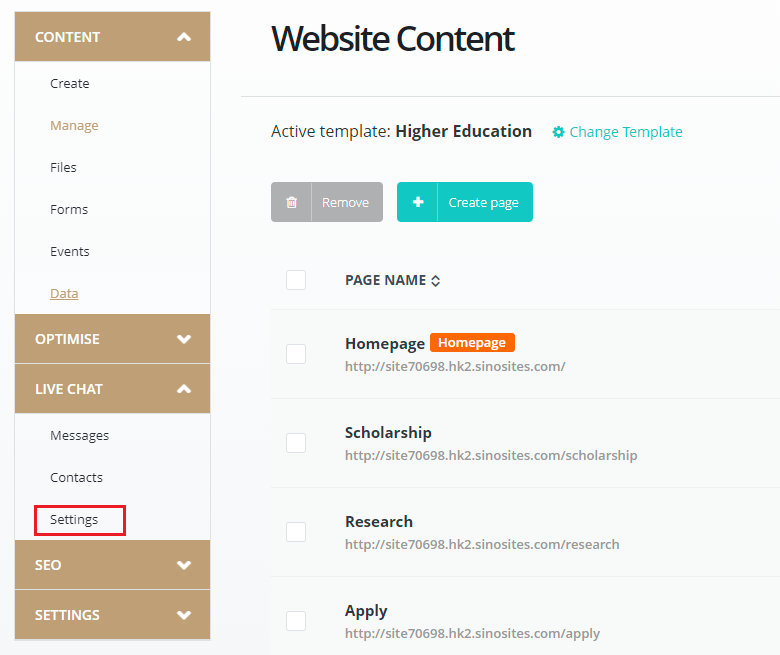
From the left-hand menu bar, click the arrow next to Live Chat to expand the menu. Next, click on Settings in the expanded Live Chat menu.

3 Go to the Target section
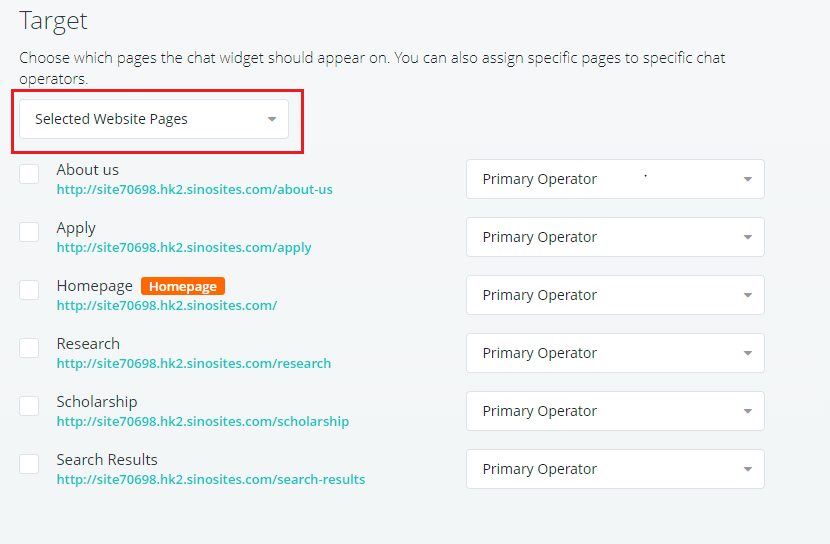
Scroll down the page until you reach the Target section.
4 Select the relevant website pages
Choose Selected Website Pages from the dropdown menu in the Target section.

5 Assign chat operators
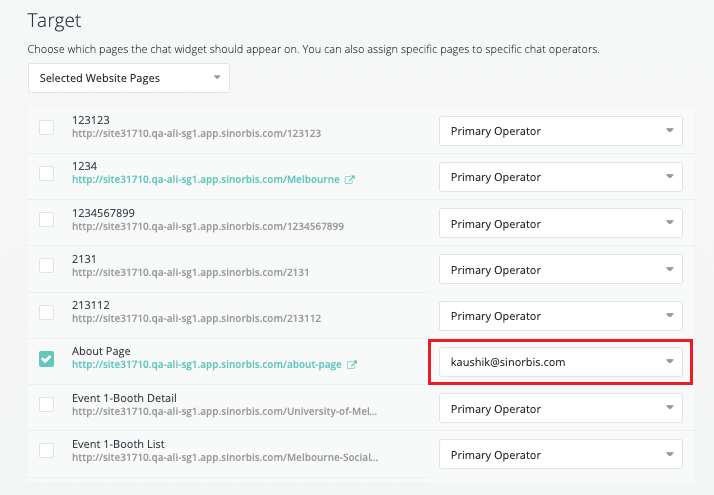
Finally, you can assign a chat operator to each individual website page. Simply click the dropdown menu next to the relevant website page and choose the chat operator you want to assign to that page.


Comments
0 comments
Article is closed for comments.