To link a web page to a Details template, you need to complete four steps.
1 Add a link column to the data set.
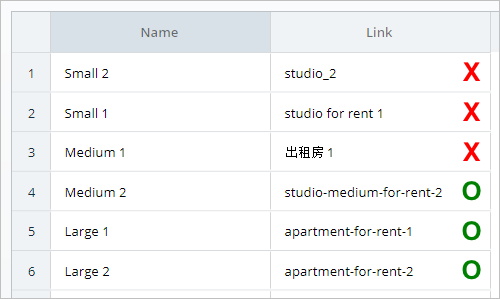
The name of the link column can be anything. In the image below, we called the link column Link. If you are not sure how to add a column to a data set, see:
Enter a unique link name for each item in the data set. In the image below, there are six items, and therefore six unique link names.
To avoid page errors later on, link names must follow basic naming rules. Each link name must be unique and should not contain:
- underscores or special characters
- spaces
- Chinese characters
You can use hyphens or forward slashes in link names.
2 Connect the web page to a data set.
Next, open the web page that will contain the details template. The aim here is to connect the page to a data set. In this example, we connect our page to a data set called Rooms for Rent.
- Scroll up to the top of the page and then click the Connect with Data button. The Connect with Data panel displays.

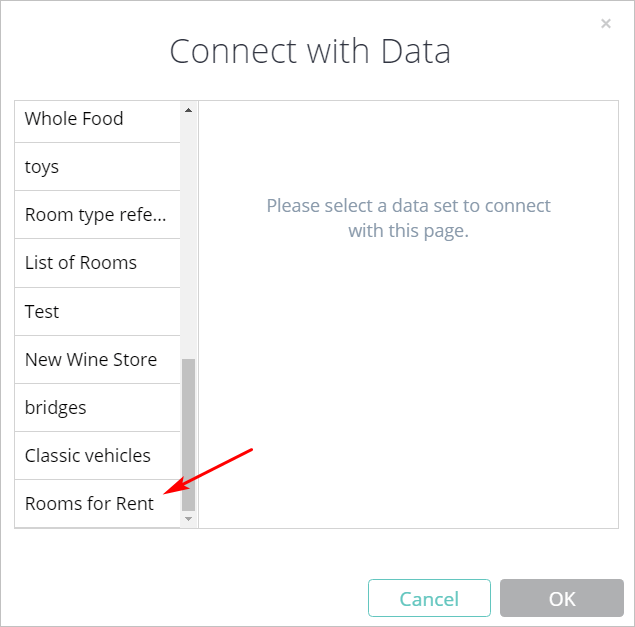
- The left side of the Connect with Data panel shows the available data sets. Scroll down the list and select the data set you want to connect to this page. In this example, we connect to Rooms for Rent.
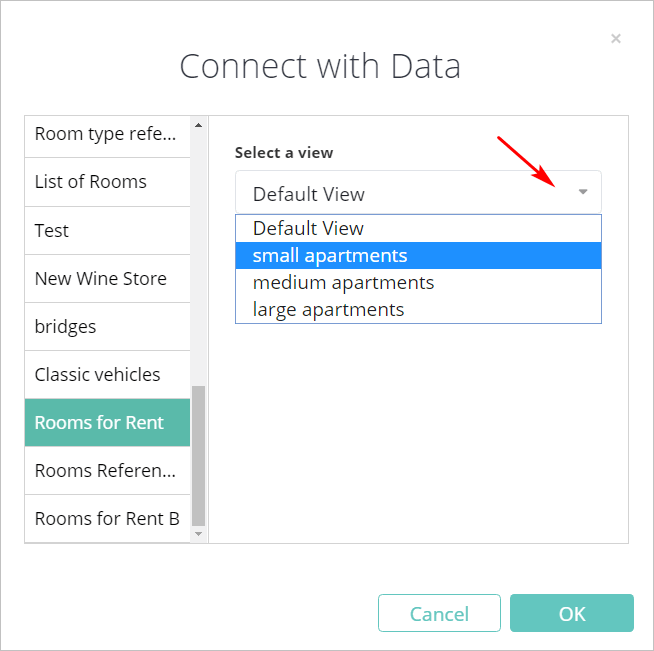
- If you are creating a details template for a subset of items in your data set, click the Select a view tab and then select a custom view. If not, leave the Default View setting. In the example below, we aim to create a details template for a subset, so we select the custom view called small apartments.
- Click OK.
The panel closes and a red bar displays across the top of the Edit Content page.
![]()
3 Connect the Settings page to a data set.
The red bar tells you that some information is missing on the Settings page.
- At the top of the Edit Content page, click the Settings button. The Edit Settings page displays.

- Scroll down to the Page URL heading.
- Type the name of the link column that you created in the data set in Step 1. As you type, the autofill function might suggest a name. In our example, the link column name is Link.

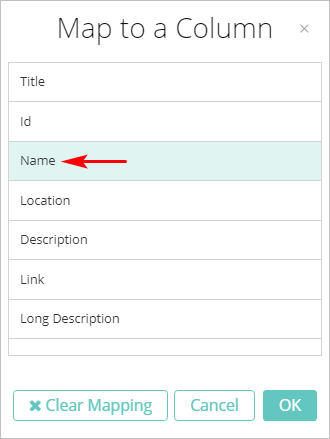
- Scroll down to the Page Title heading and then click the data set icon. The Map to a Column panel displays.

- Select the column that contains the unique name for each item in the data set. In our example, the correct column is Name.
- Click OK. The Map to Column panel closes. If mapped correctly, the Settings page displays green checkmarks.

3.1 Checking your work
After reviewing the Settings page, scroll up to the top of the page and then click the Content button. The Edit Content page displays.

At the top of the Edit Content page, two changes indicate the page is connected to a data set: a green light on the data set icon and the name of the data set.

At the top of the page, click Save and then Publish.

Every time you change a template or data set, publish the affected pages. Saving, but not publishing, does not make the changes live.
4 Check the published pages.
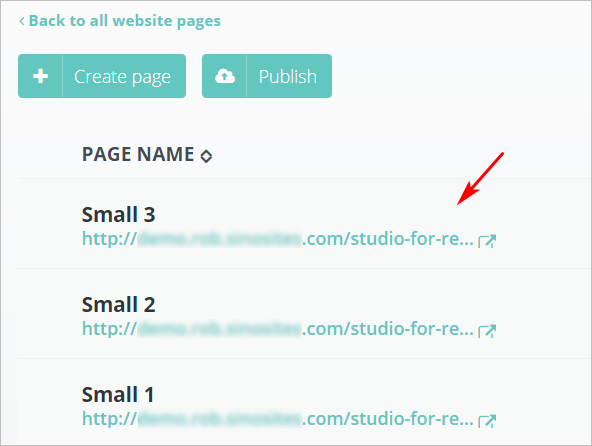
You can see if your template page has created the correct number of details pages.
- Go to the Website Content page and locate your page. In our example, the page is called Room Profile - Studio.
- Click the number next to the file name. A new page displays the details pages.

- Check the end of each URL. It should have the unique link name from the data set.
For more information, see:

Comments
0 comments
Please sign in to leave a comment.